Learning SSH can confuse beginners due to a mix of third-party programs and native OS support. Using SSH on Chrome OS is even more challenging. The solution? Establish an SSH connection from any Chrome-enabled device using the Chrome Secure Shell!
For those familiar with third-party Windows software, the Secure Shell app and Chrome extension provide functionality similar to PuTTy. The extension and app implement Xterm-compatible terminal emulators and standalone SSH clients for Chrome. These apps combine SSH commands ported to the Google Native Client with the hterm terminal emulator, allowing them to work as Secure Shell clients within the browser without relying on external proxies.
Using your Chrome browser, you can quickly establish an SSH connection. This article shows you how to do so!
Installing the Chrome Secure Shell

Depending on your device, you’ll first need to download Secure Shell from the Chrome Web Store. Click the “Add To Chrome” button in the top right-hand corner of the pop-up window after opening one of the links below in your Chrome browser.
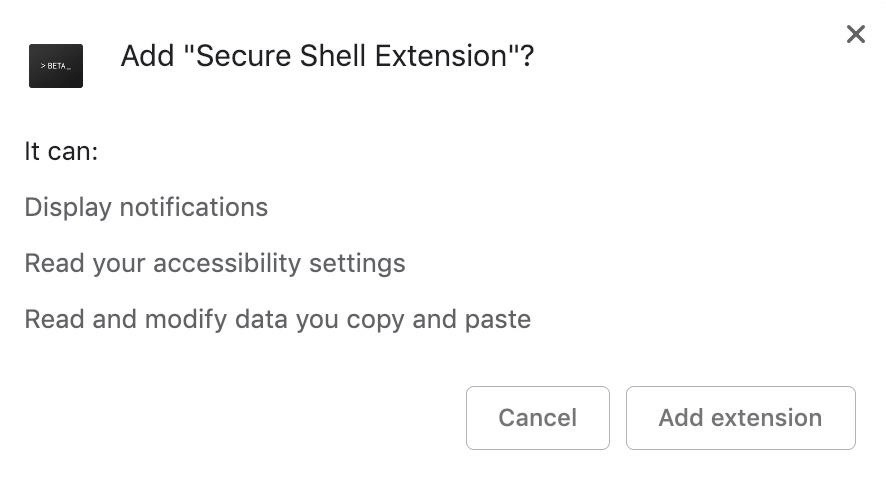
You will then be asked whether you want to add the extension or app. If you wish to do so, click “Add extension” or “Add app”.
Launching Chrome Secure Shell
In Chrome, you can access the Secure Shell Extension by clicking the toolbar icon, selecting “Connection Dialog,” or typing ssh in the address bar and hitting Tab or Spacebar followed by Enter. When you click the icon, a new window will open, while clicking the address bar shortcut opens the tab you’re currently viewing.
Secure Shell app, on the other hand, can be launched from its Web Store page by clicking “Launch App.”. It is also possible to open it in a new Chrome tab using the ssh trick in the address bar, like with the extension, by entering chrome://apps in the address bar or clicking “Apps” at the far-left of Chrome in the bookmarks bar.

Adding a New Connection
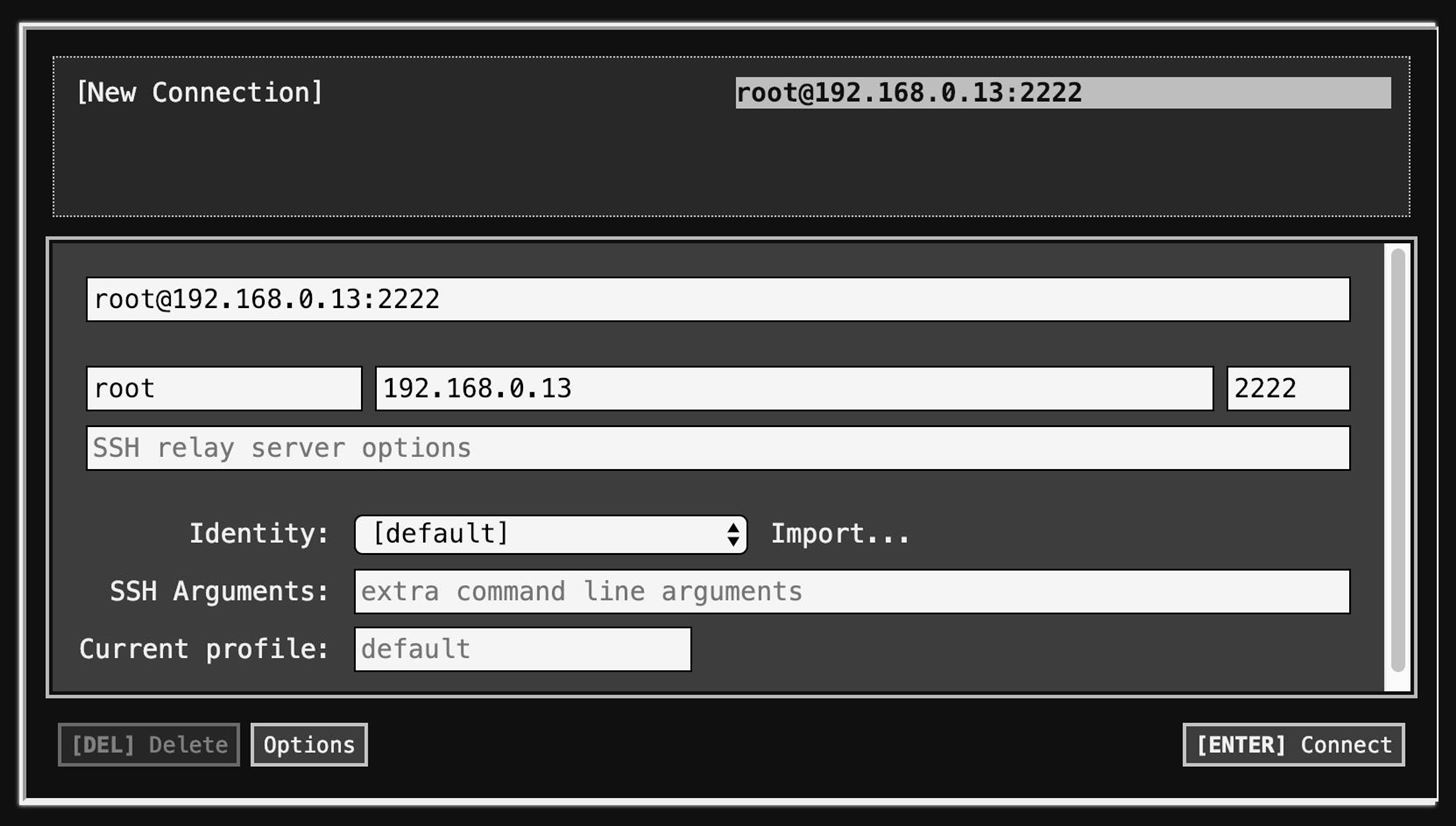
We can establish an SSH connection now that the Secure Shell app or extension is open and running. You will find several settings on the SSH screen. Ensure the “New Connection” option is selected in the first set. You will automatically be prompted to select Secure Shell.
You can give your new connection any name you like; however, try to pick a name that will help you remember what connection belongs to which device. Type the name in the top field, which says “username@hostname or free form text.” Try to pick a name that is as accurate as possible to help you remember.
Additionally, you can simply start typing the name in the name bar, and the appropriate boxes will automatically populate. You can, however, fill in the boxes manually if you prefer.
- Please type the username for the server you are connecting to in the “username” field.
- In place of the hostname, please use the IP address or web domain of the server you wish to connect to.
- Once the port has been selected, the application can begin. Changing the default SSH port number is currently possible, so your server may use a different one.

Then click the “Connect” button at the bottom of the pane or press Enter once you have entered all the required information. You can skip down to setting up key-based authentication to see what you need to do, or look at the “logging into the remote server” section to see how you will access your new saved connection.
Start Your Saved Connection
Once you have made the first connection, you must select the connection name instead of “New Connection” since the app will remember all your login details.
By typing it into the browser’s search box, you can establish an SSH connection via Secure Shell in just a few seconds. This can be done by using the following format, the same as what might be used in a macOS or Linux terminal window. Enter your connection info by tapping or pressing Spacebar.
ssh username@host: port
For even more speed, select the connection’s name when you click on the extension’s icon in the toolbar if you have the extension installed. Once connected, a new window will appear.
Log in to Your Remote Server
As soon as a connection is made, the always-familiar terminal window will appear in the tab or window. You must accept a key fingerprint the first time you connect to a server. You can use this fingerprint to identify the server you are connecting to and verify that it is legitimate.
Connecting to [email protected]… The authenticity of host ‘[192.168.0.13]:2222 ([192.168.0.13]:2222)’ can’t be established. RSA key fingerprint is SHA256:fvQg9YFJSoQ5PyyaKDx4tAUOHPkSTxs0TRWiJnIEIMM. Are you sure you want to continue connecting (yes/no)?
Your fingerprint should be the same each time you log in to the same system. If you get a notification that your fingerprint has changed, you should take that as a warning that someone is interfering with your connection. As with any other SSH connection, you’ll be required to enter your credentials after accepting the fingerprint.
That’s all there is to it! Using your Chrome browser, you have successfully established an SSH connection to your remote device using your Chrome browser.

Set up key-based authentication
SSH connections are authenticated in more ways than just passwords. Public key authentication is another popular method. Instead of a password, a cryptographic key pair is used. Those with a copy of the private key can access the server using the public key configured on the server.
When a human connects, key-based authentication eliminates the need to enter a password, thereby adding another layer of convenience. Rather than the password, the key exchange acts as the password. Authentication using a key is the de-facto method for setting up an automated SSH connection, such as file transfers.
When you click “Import” under the connection information, select your public and private keys to import identity files with Secure Shell.
There should be no file extension for the private key, while the public key should have PUB. If you have “id_rsa” as your private key and “id_rsa.pub” as your public key, you would have “id_rsa.pub.” as your private key.
The key pair must be split into two files before it can be imported from a PEM file. In a text editor, open the PEM file and copy and paste the keys into a new document. You cannot upload it otherwise.
Keep the original filename when saving the new documents. “ID_rsa.pub” is an example of a public key file name.
The identity associated with any of these keys can be deleted from the connection screen by selecting it from the menu. Now select Delete from the menu. Private and public critical files and saved connections will be removed from the HTML5 filesystem.
Conclusion
When connecting to remote devices, developers, programmers, and hackers can use the Secure Shell Chrome app to make their lives easier. It might not be a breakthrough invention, but using SSH directly from your Chrome browser brings cross-platform convenience to SSH that cannot be overstated. SSH connections should be established using the Secure Shell app, which is particularly useful for Chrome OS users.


